
Not sure how to install an outdoor light fixture? While the task may seem intimidating at first, it can be a straightforward DIY project when you have the right guidance. In fact, the key to a successful outdoor light installation lies in adhering to proper safety protocols and following step-by-step instructions. Whether you are replacing an old fixture or installing a brand-new one, this comprehensive guide will take you through the entire process. From gathering the essential tools to making the final wire connections, we will cover everything you need to know for a safe and professional-looking installation.
Before you get started, it is vital to understand that working with electrical components necessitates careful attention to safety. In this guide, we will demonstrate how to turn off the power at the circuit breaker, select the appropriately handled electrical wiring, and ensure a weatherproof installation for your outdoor space.
So, let’s transform your exterior lighting together with this beginner-friendly guide!
– Safety comes first – Always turn off power at the circuit breaker and verify the power is off before beginning any electrical work.
– Proper preparation is crucial – Gather all necessary tools and ensure you have the right light fixture that matches your existing electrical box and mounting requirements.
– Wire connections matter – Understanding basic electrical wiring (black to black, white to white, ground to ground) is essential for a safe installation.
– Weather protection is vital – Use appropriate weatherproof materials and ensure proper sealing to protect your outdoor light fixture from the elements.
– Follow manufacturer guidelines – Each porch light installation may have specific requirements, so always refer to the manufacturer’s installation instructions.
Before starting your outdoor light fixture installation, gather all necessary tools and materials. You’ll need a voltage tester, wire strippers, wire nuts, screwdrivers (both flathead and Phillips), and a ladder. Don’t forget weatherproof silicone caulk to seal around the electrical box and prevent water infiltration into your home’s exterior.
Make sure you have the new light fixture, mounting bracket, and appropriate screws. Keep spare wire nuts handy, as the old ones might be worn out. A pair of work gloves and safety glasses are also essential for protection during installation.
Supports Dental Health: As your dog eagerly gnaws on these nutritious sticks, they also promote dental hygiene by naturally scraping away plaque and tartar; this simple, natural form of dental care reduces the need for costly treatments, and supports fresher breath, healthier gums, and overall oral health. Give your canine companion a daily chew that loves them back by keeping their teeth strong and their smile bright.
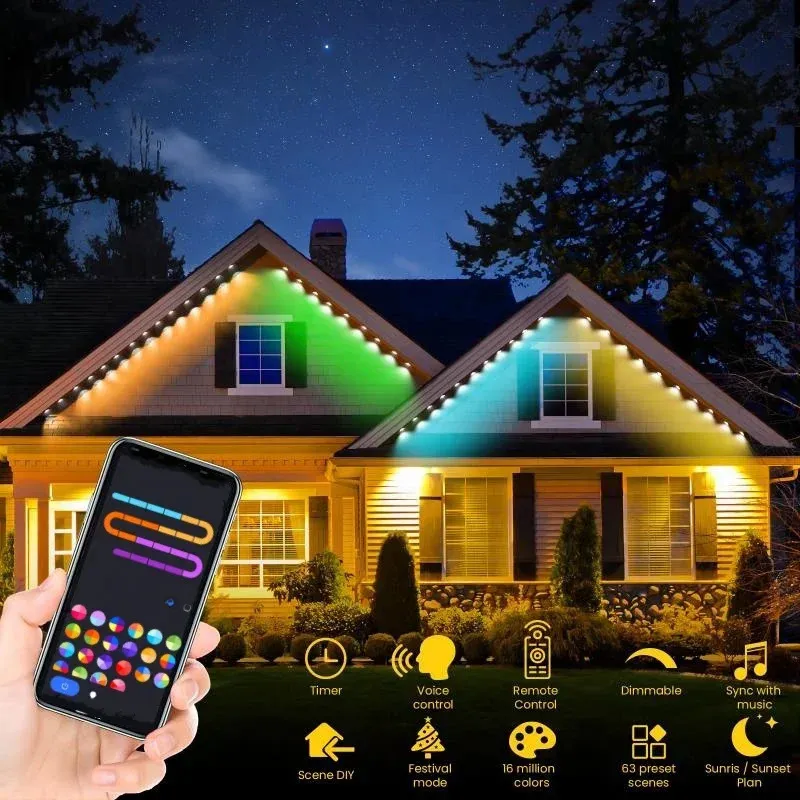
Event: Generalization Fit Design: Stylish Source of Light: LED Control Method: APP Control, Remote Control Holidays: Christmas, Halloween, New Year's, graduation, and university
Strong Illumination: For brighter, more effective lighting, Lumary outdoor pathway lights provide 36W and 500lm per light. Individual & Group Control: For unified, year-round lighting, you may use the app to control each bollard light individually or collectively.
Dynamic Multi-Color Display: 16 million RGB colours are available for vivid outdoor displays with Lumary's 6-pack smart landscape lights, which are driven by RGBAI technology. Note: The first spotlight's adaptor is 17.5 feet long and cannot be expanded.
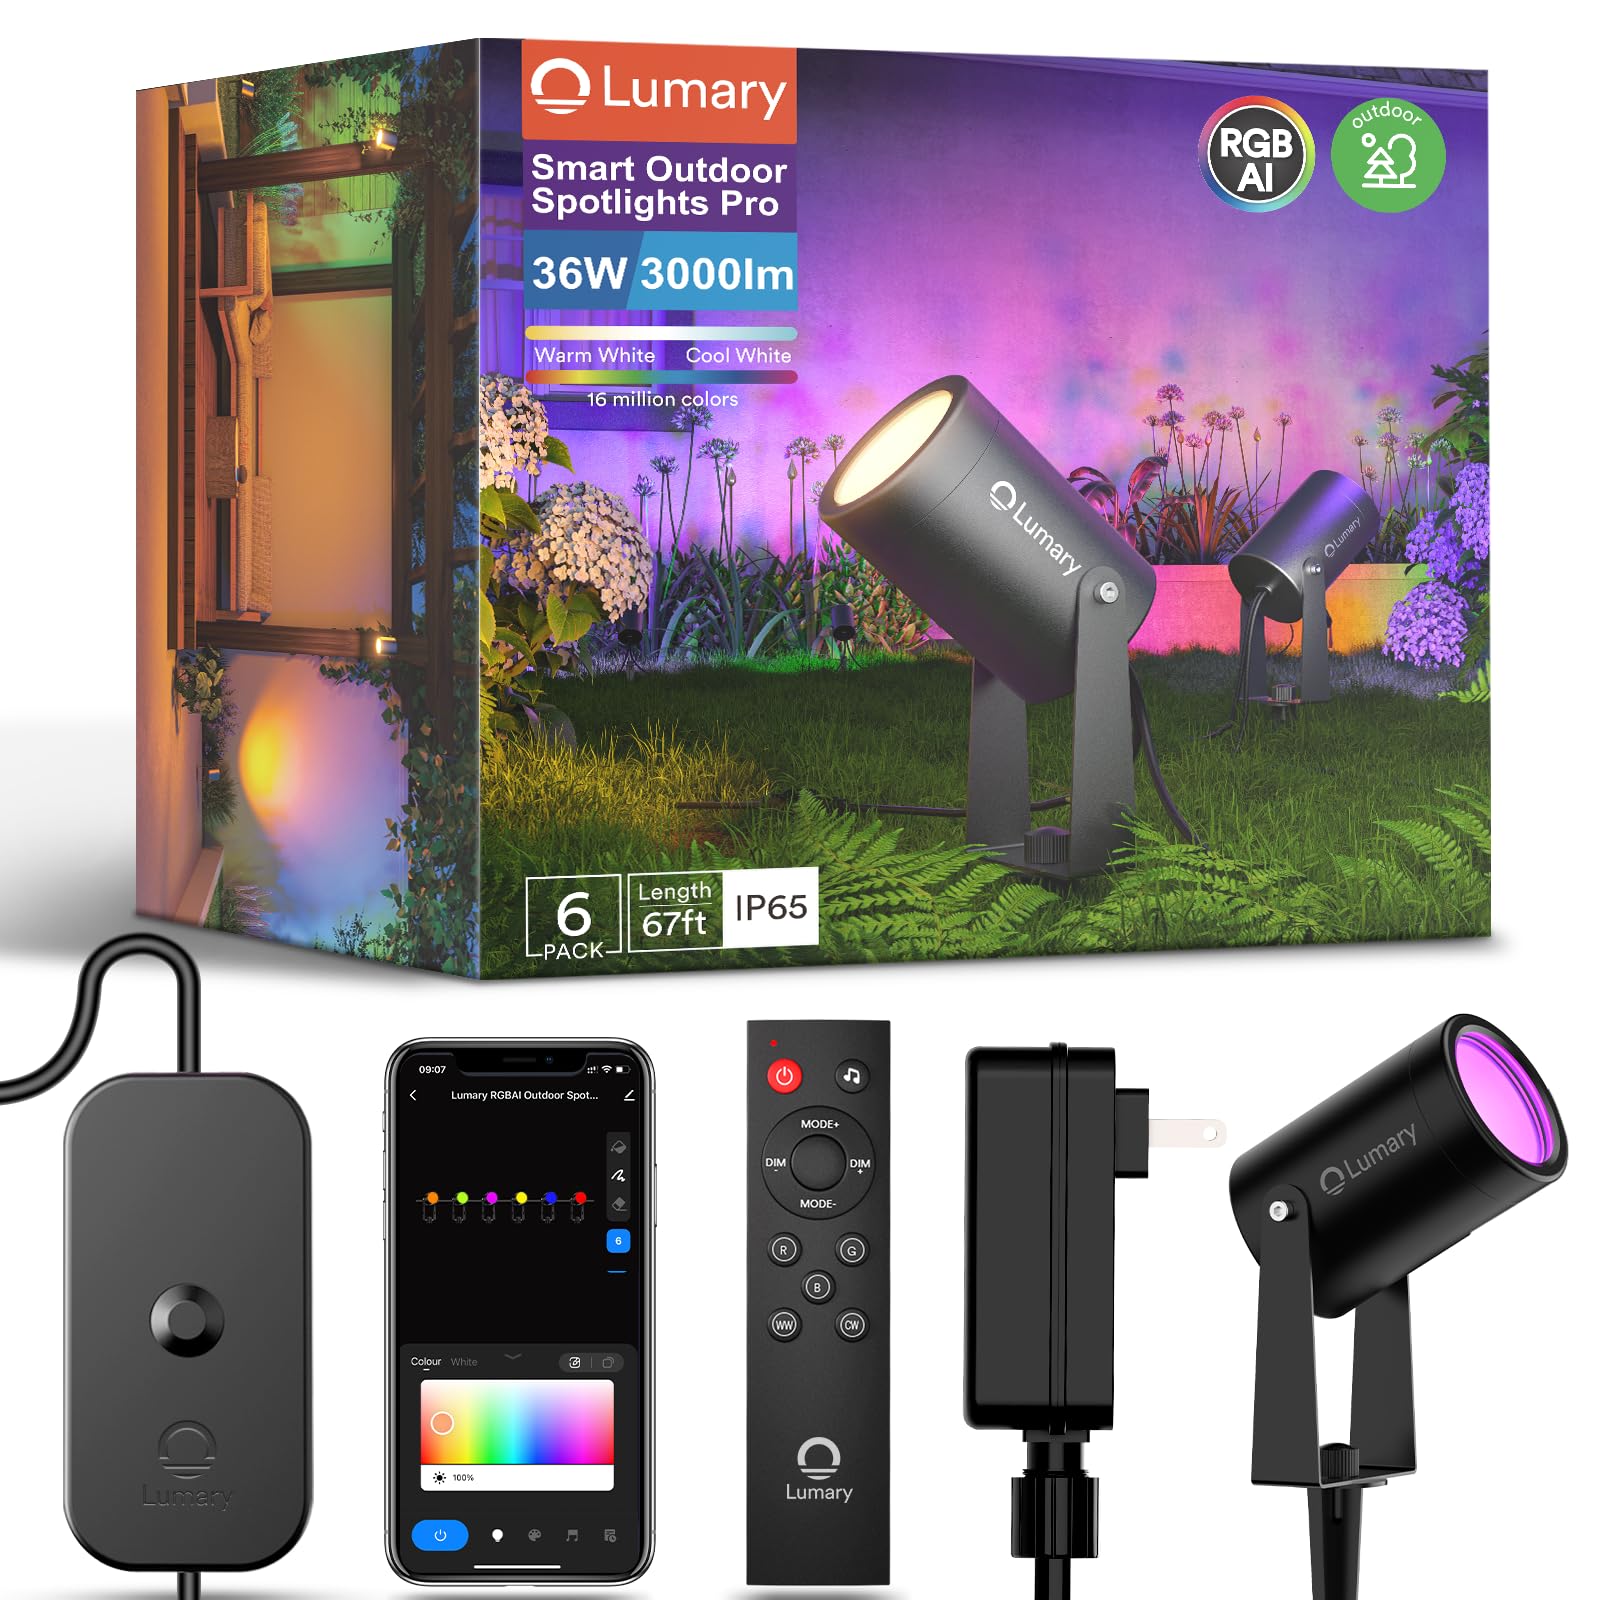
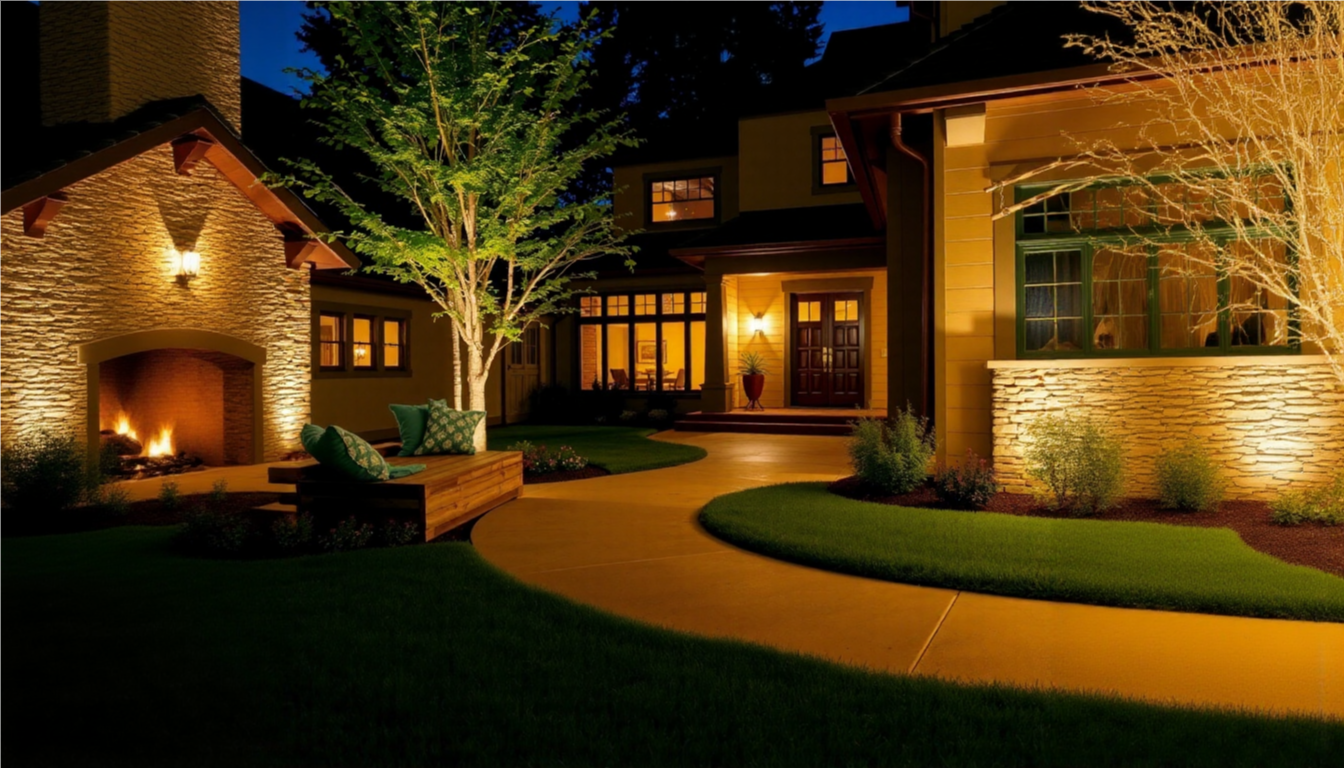
High Brightness & Colour Adjustment: With a 36W output, the Lumary Pro landscape lights produce 3000 lumens of brightness. They produce sophisticated, adaptable illumination for any mood with to RGBW technology and tuneable 2200K amber tones.
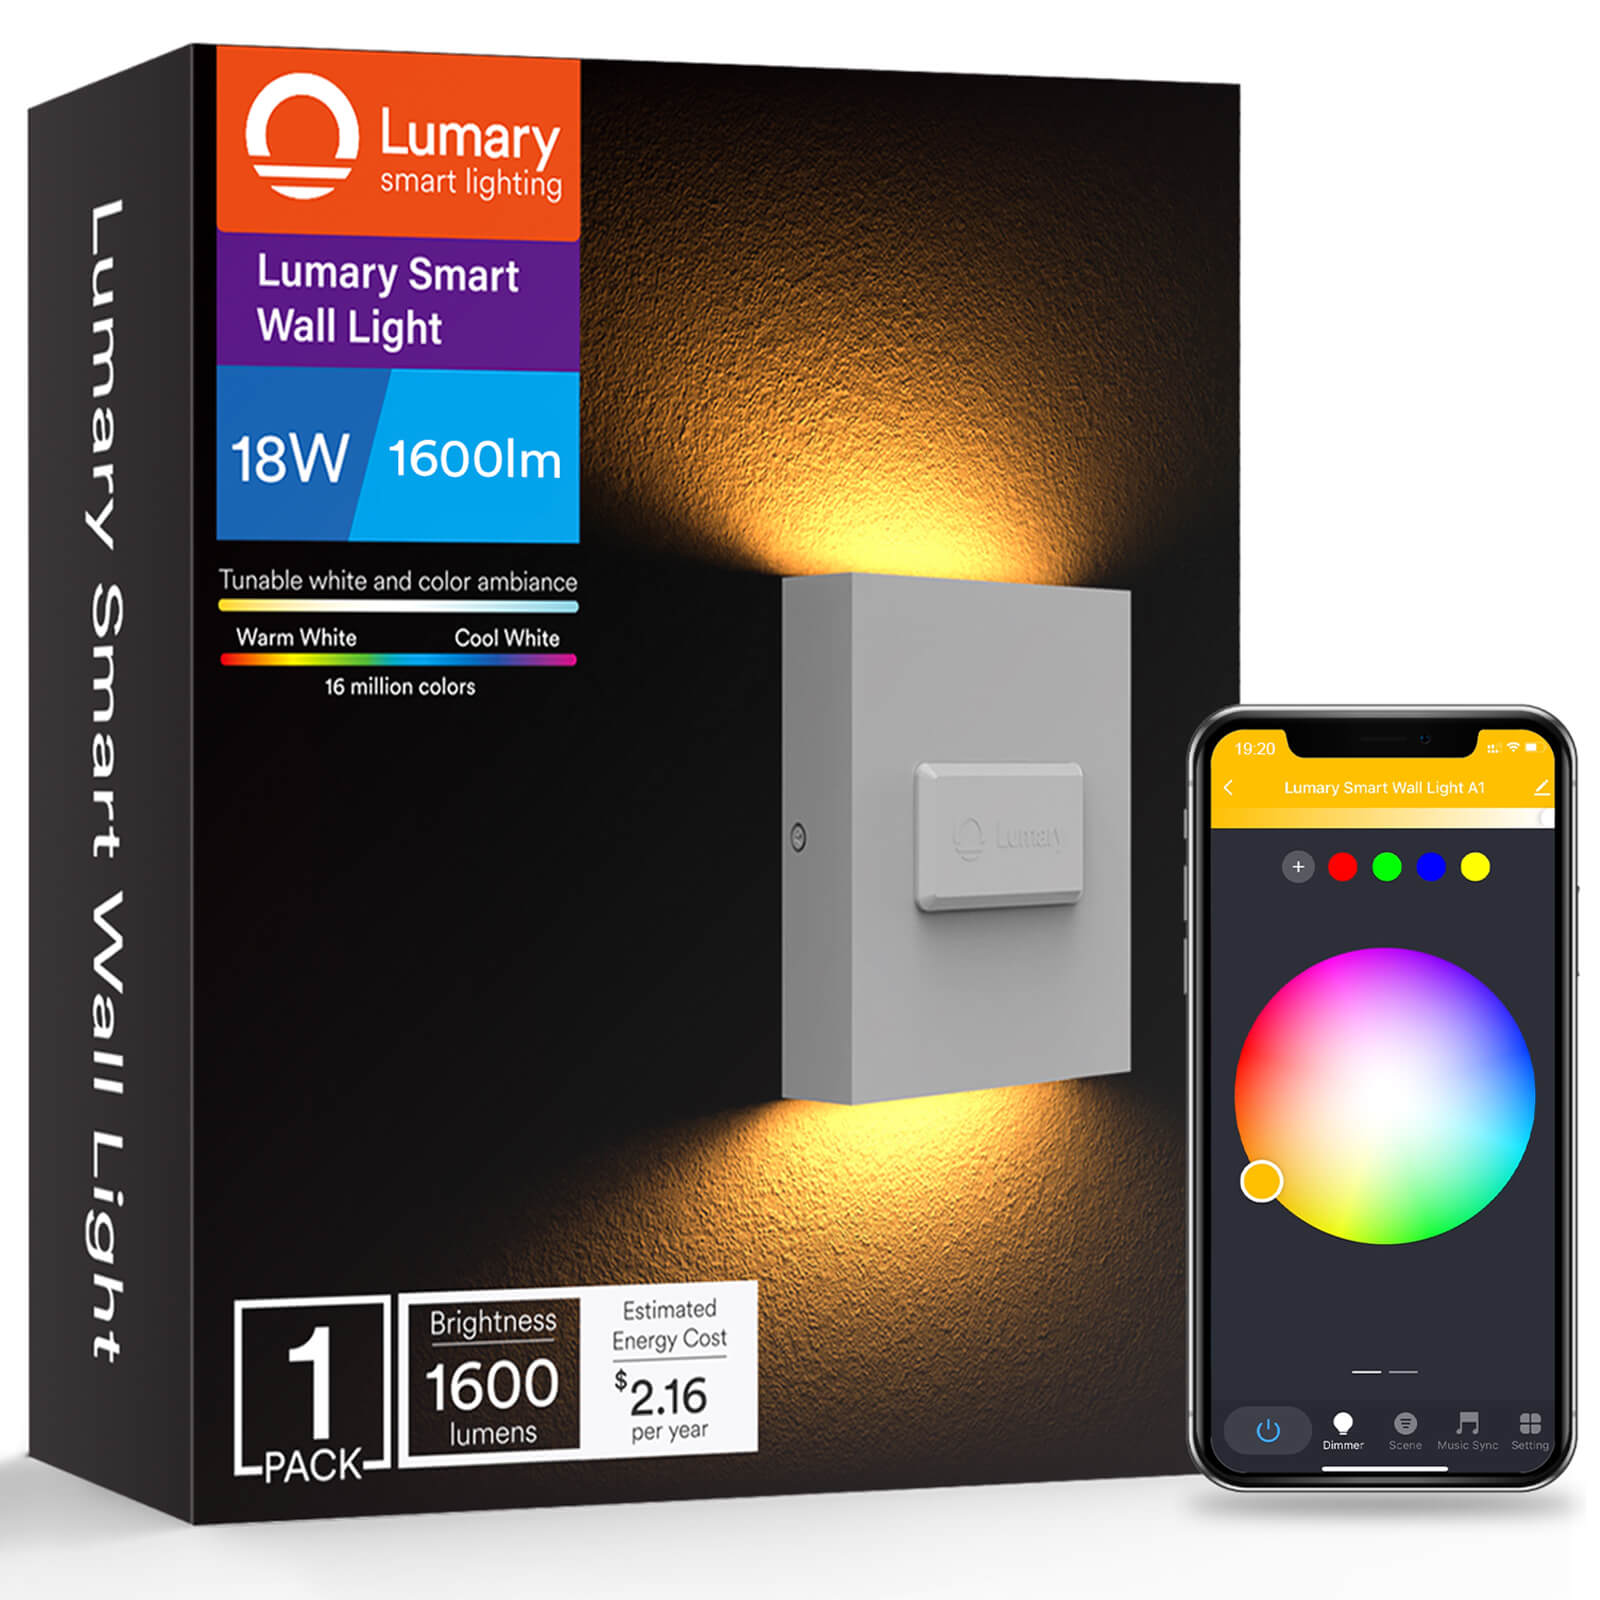
Numerous Control Options: Alexa, Google Assistant, SmartThings, Siri, the Lumary App, and a Bluetooth remote control (separately offered) are all compatible with the Lumary outdoor wall sconce. Note: Only works with 2.4GHz Wi-Fi; HomeKit and 5GHz are incompatible.
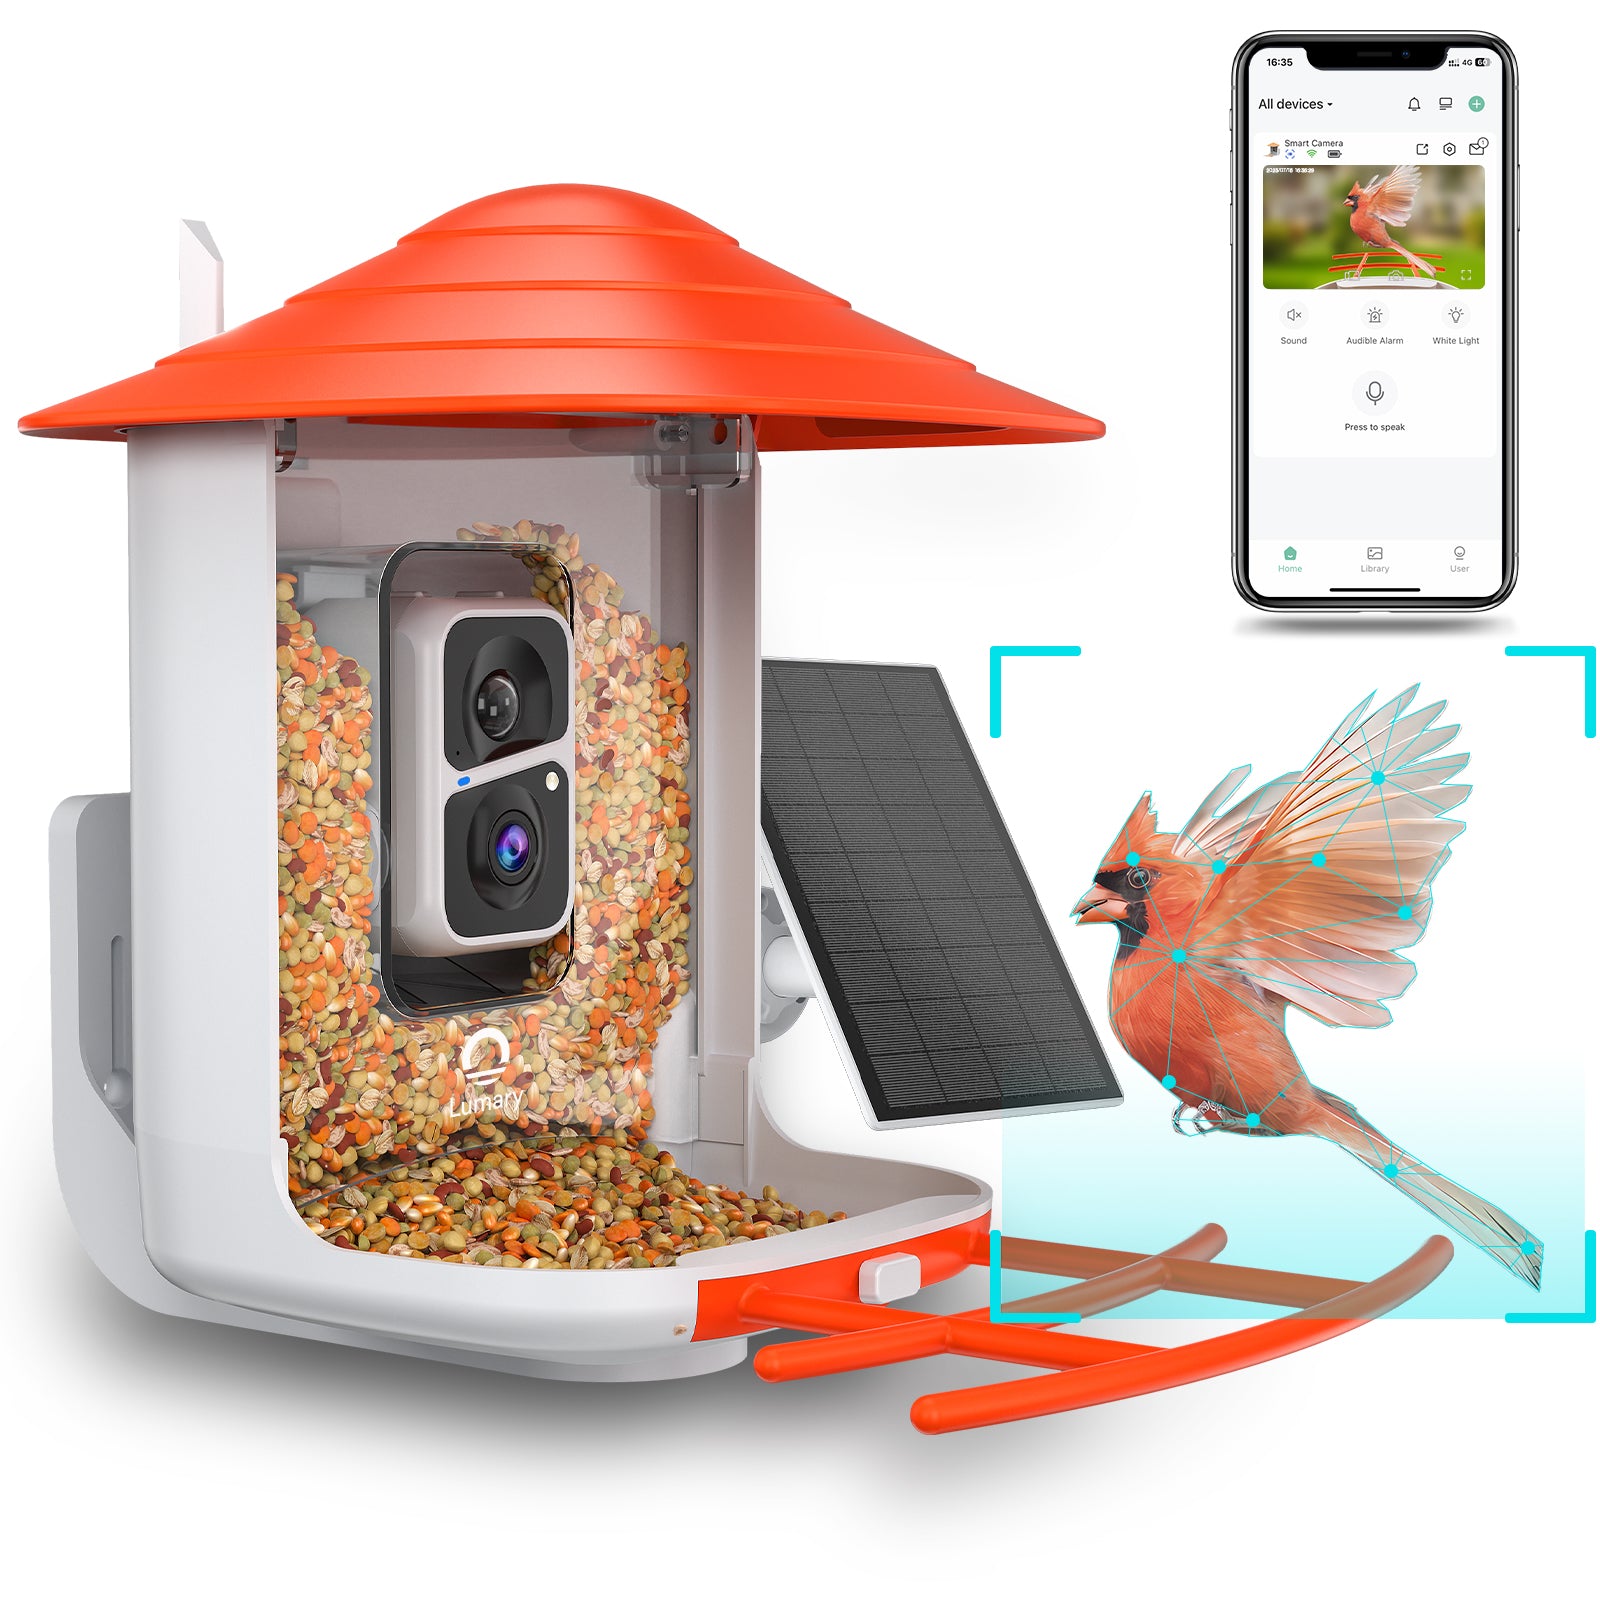
VISIT YOUR BEAUTIFUL GARDEN TO SEE THE BIRDS: With its high-definition smart AI camera, the Lumary smart bird feeder can automatically detect over 10,000 bird species and record visiting birds in real time. To make your bird watching experience more thrilling, you can also use the mobile phone app to observe these tiny elves of nature in real time. This way, you can see and know when these birds are visiting your lovely garden.
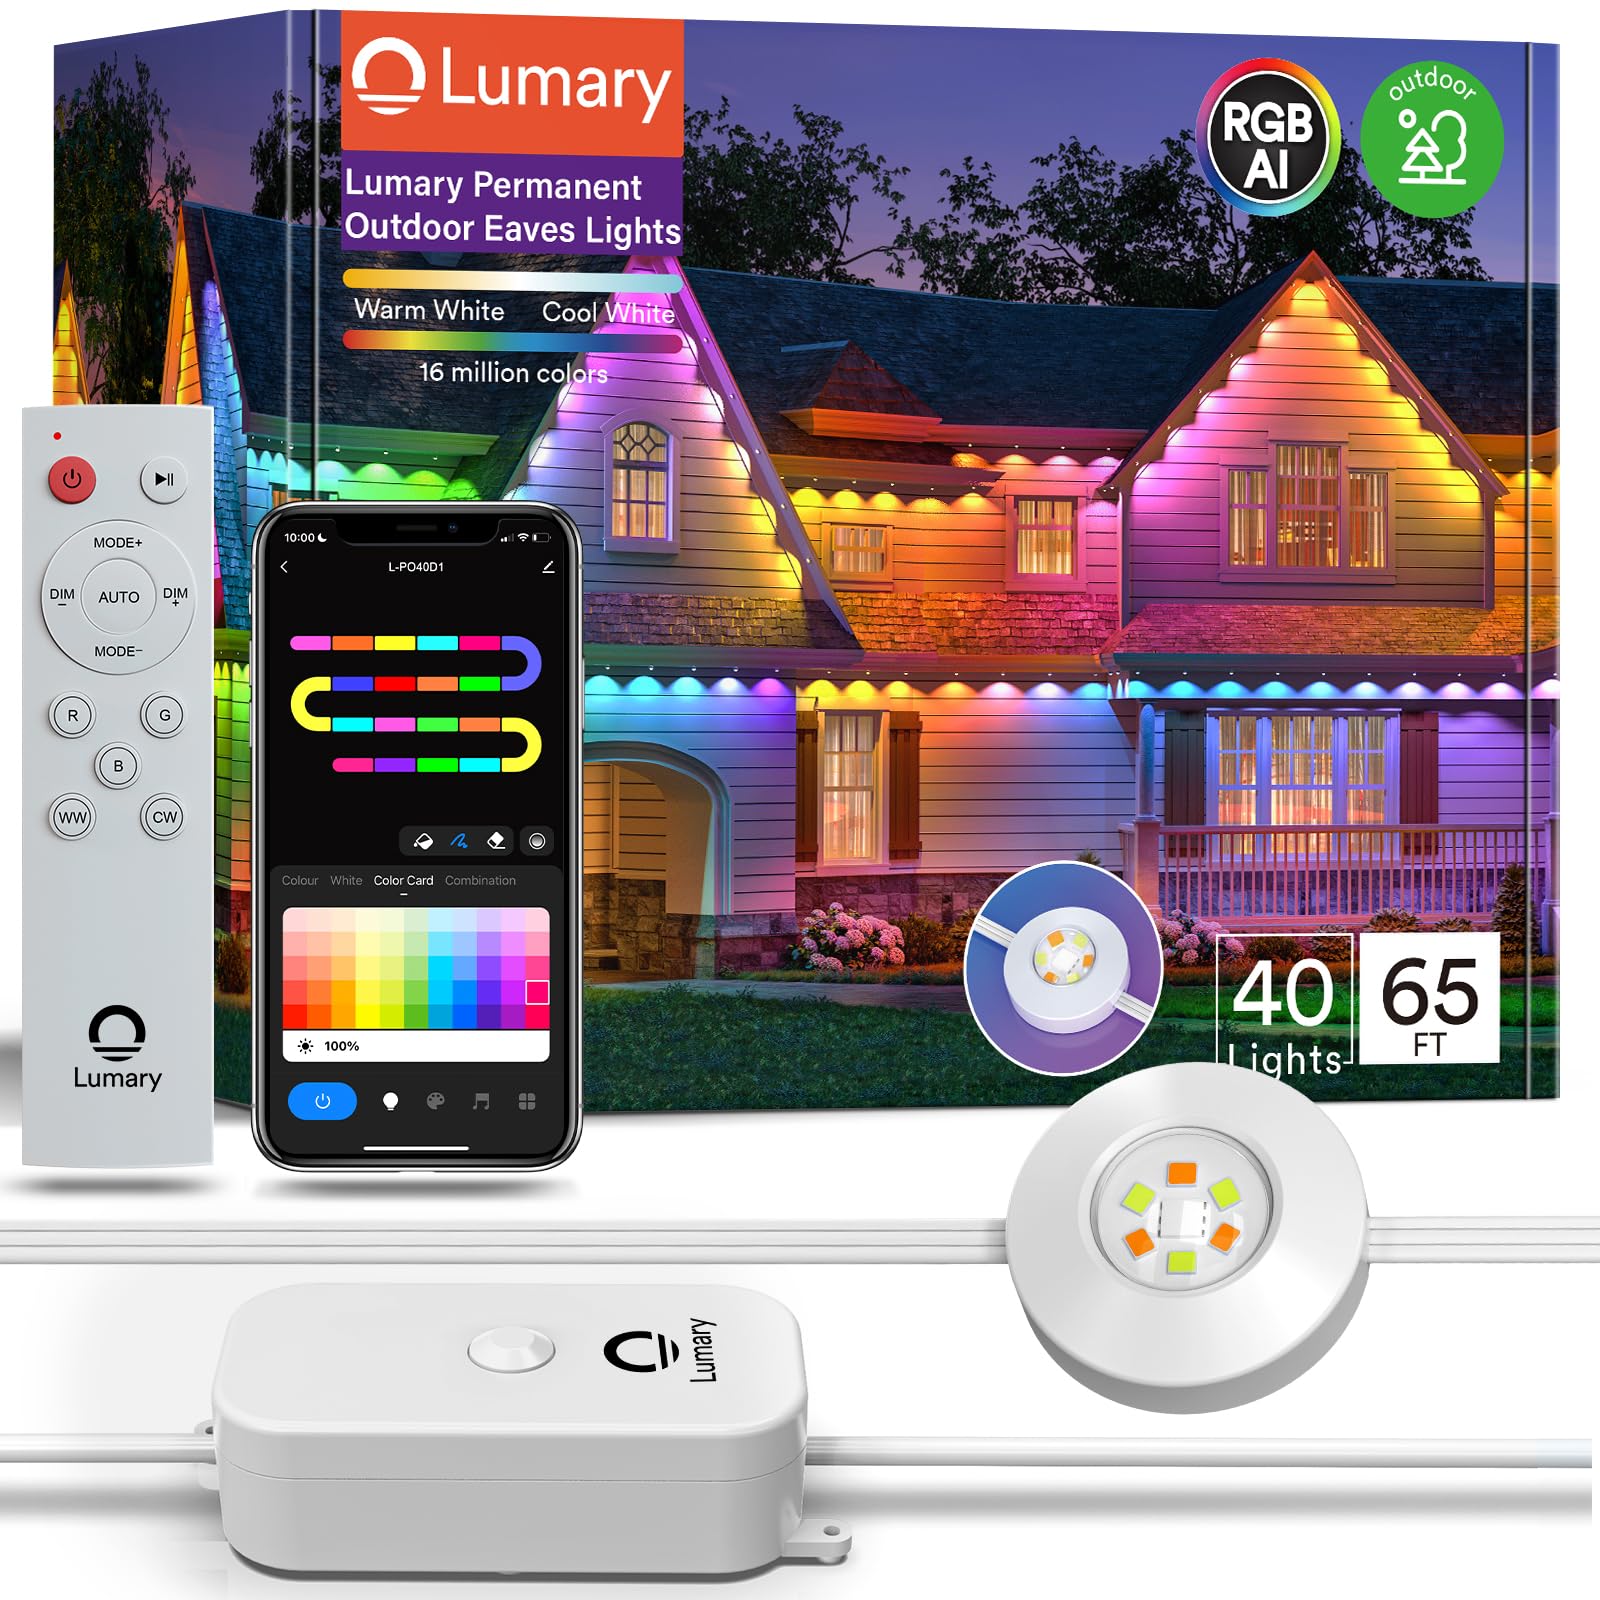
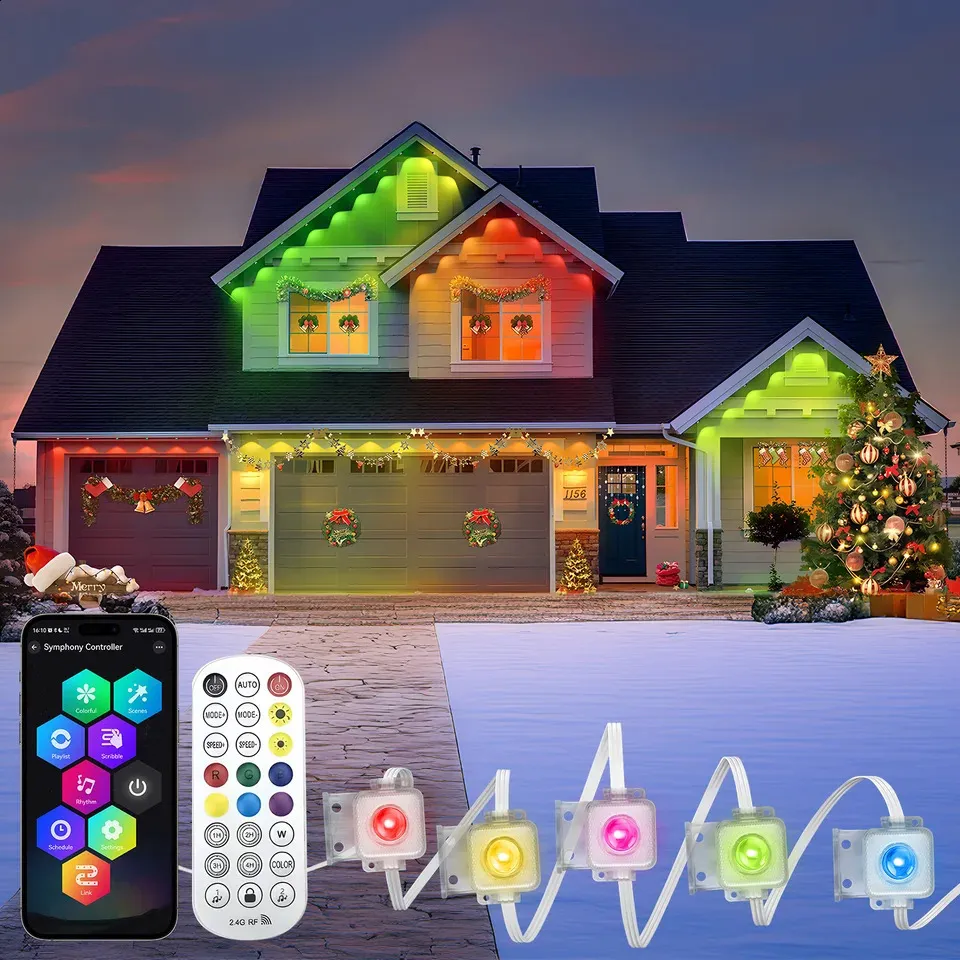
Better LED Beads: The advanced RGBAI+WW+CW LED beads in Lumary Permanent Outdoor Lights Pro can generate up to 48 lumens per light and feature colour temperatures that can be set between 2200K and 6500K.
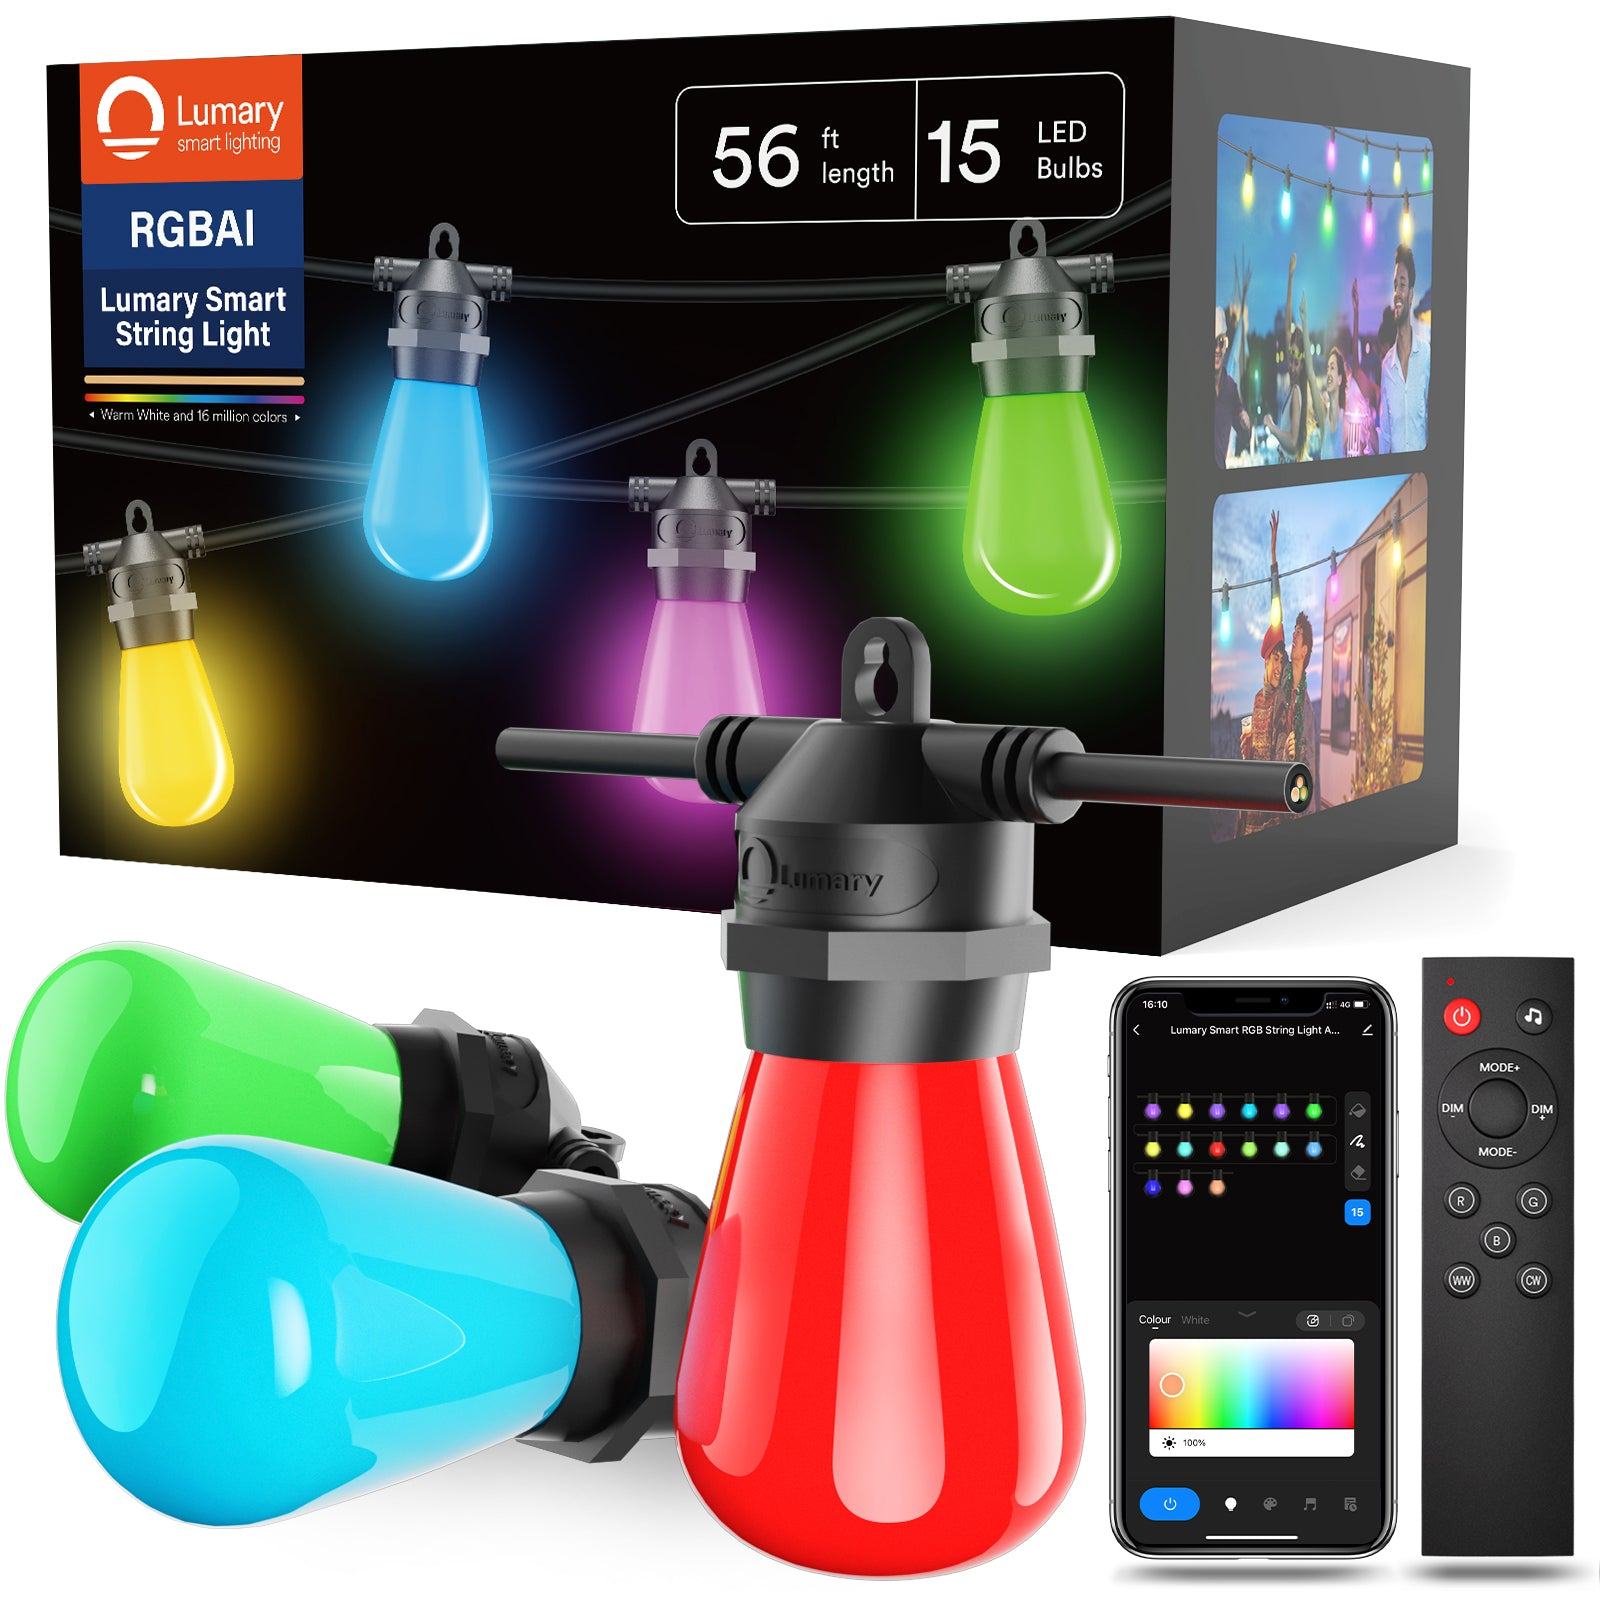
Several Control Options: Use the Lumary App (2.4G Wi-Fi), remote, control box, or voice control (Alexa, Google Assistant, Siri) to operate the Lumary patio string lights. RGBAIWW Technology: With RGBAI technology, you may enjoy multi-color displays with 16 million colours and warm white mode for every occasion.
Working with electricity requires strict adherence to safety protocols. Always turn off power at the circuit breaker before beginning any electrical work. Double-check with a voltage tester to ensure no current is flowing to the fixture.
Never work on electrical installations during wet weather or when standing on wet ground. When using a ladder, ensure it’s placed on stable, level ground and maintain three points of contact at all times. Keep children and pets away from the work area to prevent accidents.
Key Takeaway: Before installing an outdoor light fixture, gather all essential tools and prioritize
safety by turning off power at the circuit breaker and using proper protective equipment.
When selecting how to install outdoor light fixture outdoor light fixture, you will discover a variety of options that can significantly enhance your home’s exterior. For instance, a stylish porch light not only adds a decorative touch but also provides essential illumination for your entryway. Therefore, it is important to consider your specific needs—whether you require bright lighting for security purposes or softer, low-watt lighting to create a cozy ambiance.
Moreover, traditional lantern-style fixtures offer a timeless appeal that many homeowners appreciate. In contrast, modern designs often feature clean lines and contemporary finishes, catering to those who prefer a sleek look. Additionally, multi-bulb lighting options can provide versatile illumination, allowing you to create stunning visual effects that enhance your outdoor space. Furthermore, some fixtures cleverly combine functionality with decorative elements, such as frosted glass or metallic accents, which can elevate the overall aesthetic of your home.
The scale of your light fixture should complement your home’s architecture and available space. Measure the mounting area carefully – a fixture that’s too large or small can look awkward and affect functionality.
For entryways, choose fixtures that are approximately 1/3 the door height. Consider the fixture’s projection from the wall, especially in high-traffic areas. The mounting height should typically be around eye level, roughly 66-72 inches from the ground for optimal illumination.
Key Takeaway: Select a smart outdoor light fixture that balances style with proper sizing, considering both aesthetic appeal and practical lighting needs while ensuring it fits your space requirements.
After disconnecting the wires, support the current fixture with one hand while removing the mounting screws. These screws usually secure the fixture to a mounting strap or bracket. Be þÿprepared outdoor fixtures can be heavy and may require an extra set
Gently pull the old light fixture away from the wall, being careful not to damage the existing wire connections inside. If the mounting bracket appears old or rusty, it’s best to replace it with the new bracket that comes with your replacement fixture.
Inspect the area where the fixture was mounted for any signs of water damage or deterioration. This is the perfect time to ensure the mounting surface is in good condition before installing the new light.
Key Takeaway: Safely remove your old light fixture by turning off power, disconnecting wires carefully, and removing mounting hardware while protecting existing wire connections for the new installation.
Before diving into the installation process, it’s crucial to properly prepare the area where your new outdoor light fixture will be mounted. This preparation ensures a secure and long-lasting installation while maintaining the integrity of your home’s exterior.
Different exterior surfaces require specific preparation methods to ensure proper installation of your exterior light box. Here’s what you need to consider:
For vinyl or wood siding:
– Inspect the existing structure for any signs of water damage or rot
– Clean the mounting area thoroughly with a mild detergent
– Check if a mounting block is needed to provide a flat surface
– Mark the wire locations carefully to avoid drilling through them
For brick or stone surfaces:
– Use a masonry brush to remove loose debris and dirt
– Ensure the different exterior surface is structurally sound
– Check for existing anchor points or drill new ones if needed
– Apply waterproof sealant around mounting holes
For stucco or concrete:
– Test the surface stability by tapping gently
– Clean the area with a wire brush
– Mark mounting points with a pencil
– Pre-drill holes using appropriate masonry bits
Remember to protect surrounding areas with drop cloths and keep your tools organized for easy access during installation.
Key Takeaway: Proper surface preparation is essential for a secure outdoor light fixture installation, with specific methods required for different exterior materials to ensure long-term stability and safety.
When it comes to installing your new outdoor light fixture mount, proper alignment is crucial for both functionality and aesthetics. Start by positioning the mounting strap against the junction box, þÿensuring it’s perfectly level. Use a spirit level to verify the alignmeyour fixture look unprofessional.
Once you’ve confirmed the position, secure the new mount firmly to the junction box using the provided mounting screws. The mounting strap should sit flush against the surface without any gaps. Double-check that all connections are tight, as loose hardware can lead to wobbling or potential safety hazards.
If your fixture mount comes with additional support brackets, install them according to the manufacturer’s specifications. These extra components help distribute the weight evenly and
provide added stability, especially for heavier fixtures.
Key Takeaway: Proper alignment and secure installation of the mounting strap are essential steps that ensure your outdoor light fixture will be stable, level, and safe for long-term use.
How to install outdoor light fixture? Installing an outdoor light fixture might seem daunting, but with the right guidance, it’s a DIY project you can tackle with confidence. The key to a successful outdoor light installation lies in following proper safety protocols and step-by-step instructions. Whether you’re replacing an old fixture or installing a new one, this comprehensive guide will walk you through the entire process. From gathering the essential tools to making the final wire connections, we’ll cover everything you need to know for a safe and professional-looking installation. Before you begin, it’s crucial to understand that working with electrical components requires careful attention to safety. We’ll show you how to: “turn off power at the circuit breaker.” Select the properly handled electrical wiring. Ensure weatherproof installation of the outdoor space. Let’s transform your exterior lighting with this beginner-friendly guide.
Before you begin connecting any wires while learning how to install an outdoor light fixture, it is essential to ensure that the power is completely turned off at the circuit breaker. This step is crucial for your safety throughout the installation process.
To start, identify the different wires in your supply line. Typically, you will find three main wires: a black wire (hot), a white wire (neutral), and a copper-colored wire (ground).
These correspond to similar wires in your new light fixture, making it easier to connect them correctly.
First, connect the black wire from your supply line to the black wire of your fixture. Be sure to use wire nuts to secure these connections, twisting them clockwise until they are tight. Next, join the white wires together, following the same process to ensure a secure connection.
Finally, connect the copper-colored wire (ground wire) from your home’s electrical box to the green or bare copper wire on your fixture. This connection is vital for safety, as it helps prevent electrical shocks.After making all the connections, double-check to ensure they are secure and properly insulated. Gently tug on each wire to verify that the connections will not come loose during use.
Key Takeaway: When wiring your outdoor light fixture, always match wire colors correctly and ensure tight connections, with special attention to the ground wire for safety.
With your new light fixture in position, carefully connect the wires according to the manufacturer’s installation instructions. Match black to black (hot), white to white (neutral), and copper/green to copper/green (ground). Secure all connections with wire nuts and tuck them neatly into the electrical box.
Once you have completed the wiring, the next step in learning how to install an outdoor light fixture is to gently push the fixture against the mounting bracket and secure it using the provided mounting screws. After that, install the appropriate light bulb according to the fixture’s specifications. It is also important to double-check all connections to ensure that the fixture is level and properly aligned.
Before you restore power, take a moment to verify that all wire connections are tight and adequately insulated. Once you are confident everything is secure, turn the power back on at the circuit breaker and test your newly installed fixture. If it does not work immediately, do not panic; simply turn the power off again and recheck your wire connections to ensure everything is correctly set up.
Key Takeaway: Proper wire connections and secure mounting are crucial for a safe and functional outdoor light installation – always test the fixture before considering the job complete.
Installing an outdoor light fixture is a rewarding DIY project that enhances both the security and aesthetic appeal of your home’s exterior. By following this comprehensive guide, you can confidently tackle the installation process while ensuring safety and professional results. Remember to always prioritize safety by turning off power at the circuit breaker, using appropriate tools, and following manufacturer’s instructions carefully. Whether you’re replacing an old fixture or installing a new one, proper wire connections and weatherproofing are crucial for long-lasting performance. Take pride in transforming your outdoor space with a stylish porch light that suits your home’s architecture. If you encounter any challenges during installation or feel unsure about electrical work, don’t hesitate to consult a licensed electrician. Share your successful installation experience in the comments below, and explore our related guides for more home improvement projects that can enhance your exterior lighting setup.
The average cost ranges from $150 to $400, including the fixture and professional installation. DIY installation can save you $100-200 in labor costs. However, costs may vary depending on fixture type, location, and whether electrical modifications are needed.
For a DIY enthusiast, installing an outdoor light fixture usually takes 1-2 hours, assuming you’re replacing an existing fixture. New installations requiring wiring may take 2-4 hours. Professional electricians can complete the job in about 30-60 minutes.
It’s not recommended to install outdoor light fixtures during wet conditions. Water can create electrical hazards and interfere with proper installation. Always choose a dry day with clear weather to ensure safe installation and proper sealing.
Yes, outdoor light fixtures require weather-resistant electrical boxes rated for exterior use. These boxes should be UL-listed for wet locations and include weatherproof gaskets and covers to prevent moisture from entering the electrical connections.
Introduction Orchid plants are some of the most wonderful and mysterious plants on earth. With proper care—especially choosing the right
Introduction Air fryer recipes for chicken have taken the internet by storm, and for good reason! Using an air fryer
Spicy Korean Tteokbokki Recipe: Make Delicious Rice Cakes at Home Introduction tteokbokki rice cake recipe, widely celebrated as a popular
Obon Appetite is a participant in the Amazon Services LLC Associates Program, an affiliate advertising program designed to provide a means for sites to earn advertising fees by advertising and linking to amazon.com. As an Amazon Associate I earn from qualifying purchases.